Skip to content

Stefan van Bruggen Posts

[Powershell] Create Microsoft 365 admin account on all managed tenants

I received a question from a customer asking me for a way to create MFA-enabled administrator accounts on all Microsoft 365 tenants managed through the Partner portal, without having to manually go to each tenant and creating them. To solve this, I threw together a quick script that imports a .CSV file containing the DisplayName, UserPrincipalName and Password and then goes through every managed tenant to create the accounts and enables MFA on the newly created accounts.

As an extra bonus, I’ve also provided a script that could be used to remove the accounts on all managed tenants.

Enjoy!

Account Creation

<#
.Description
	This script is used for creating (multiple) Microsoft 365 tenant administrator accounts for all tenants managed by your MSP.
	Current Version: 1.1
	
	Version History:
   ---------------- 
   v1.0: First release.
   v1.1: Fixed a bug that caused trouble when adding roles.
   
	By: Stefan van Bruggen

#>


# Connect to Microsoft 365 using your partner account credentials.

Connect-MsolService

# Get managed tenant IDs and prefixes.

Get-MsolPartnerContract -All | ForEach {
    $TenantPrefix = [string]$_.DefaultDomainName
    $TenantId = [string]$_.TenantId.Guid
      
		# Define administrator roles to be granted to the user.
      
		$Roles = "Authentication Administrator","Azure Information Protection Administrator","Company Administrator","Conditional Access Administrator","Directory Readers","Directory Synchronization Accounts","Directory Writers","Exchange Service Administrator","Helpdesk Administrator","Hybrid Identity Administrator","Intune Service Administrator","Kaizala Administrator","License Administrator","Message Center Privacy Reader","Message Center Reader","Partner Tier1 Support","Partner Tier2 Support","Password Administrator","Privileged Authentication Administrator","Privileged Role Administrator","Reports Reader","Service Support Administrator","SharePoint Service Administrator","Teams Communications Administrator","Teams Communications Support Engineer","Teams Communications Support Specialist","Teams Service Administrator","User Account Administrator"
    
		# Import users from .csv and create new user account, the .csv should have the following fields: DisplayName,UserPrincipalName,Password
      
		Import-Csv .\users.csv | ForEach {
        $newUPN = $_.UserPrincipalName + "@" + $TenantPrefix
        $newUPN = [string]$newUPN
        New-MsolUser -DisplayName $_.DisplayName -UserPrincipalName $newUPN -Password $_.Password -ForceChangePassword:$true -PasswordNeverExpires:$true -TenantId $TenantId 
        
        # Add newly created user account to previously defined administrator roles

        ForEach($role in $roles){
            Add-MsolRoleMember -TenantId $TenantId -RoleName $role -RoleMemberEmailAddress $newUPN
      }
    
    }  
      
      # Set required variables for MFA.
      
      $st = New-Object -TypeName Microsoft.Online.Administration.StrongAuthenticationRequirement
      $st.RelyingParty = "*"
      $st.State = "Enabled"
      $sta = @($st)
      
      # Enable MFA.
      
      Set-MsolUser -TenantId $TenantId -UserPrincipalName $newUPN -StrongAuthenticationRequirements $sta
}

Account Removal

<#
.Description
	This script is used for removing (multiple) Microsoft 365 tenant administrator accounts for all tenants managed by your MSP.
	Current Version: 1.0
   
	By: Stefan van Bruggen, Open ICT
		s.vanbruggen@open-ict.nl

#>


# Connect to Microsoft 365 using your partner account credentials.

Connect-MsolService

# Get managed tenant IDs and prefixes.

Get-MsolPartnerContract -All | ForEach {
    $TenantPrefix = [string]$_.DefaultDomainName
    $TenantId = [string]$_.TenantId.Guid
	
# Import list of users that need to be removed from .csv and remove the accounts, the .csv should have the following fields: UserPrincipalName
	
	Import-Csv .\delete-users.csv | ForEach {
        $UPN = $_.UserPrincipalName + "@" + $TenantPrefix
        $UPN = [string]$UPN
        Remove-MsolUser -UserPrincipalName $UPN -TenantId $TenantId -Force
    }
	
}

[Fixed] Adobe Reader DC High CPU usage

After updating Adobe Reader DC on our XenApp 7.15 environment we started seeing the acrord32.exe generating a high amount of CPU usage, causing performance issues for the end-users.

A quick fix was to kill all the acrord32.exe processes that were stuck running in the background, but we couldn’t reproduce the issue with a test account so troubleshooting this turned out to be a bit of a hassle.

It turned out that when starting Adobe Reader, it tries to find the following registry key:
[HKCU\SOFTWARE\Microsoft\Windows\CurrentVersion\Themes\Personalize]

We were able to confirm this with Sysinternals’ process monitor, in this case the problem didn’t occur because Adobe was able to find the registry key:

If this key doesn’t exist, the process will be stuck in the background using up to 25% CPU per instance.

We created a new action in WEM and pushed the registry key to our users, this solved the problem.

This issue occurs in the following versions of Adobe Reader DC:
2019.021.20047
2019.021.20048

[Powershell] Enabling a testaccount with a randomly generated password

Another script to share, it’s quick and dirty but it does what it’s supposed to do so I might as well share it with whoever needs it.

The script was written for a hosted environment with three customers, each with a seperate test account. The test accounts are disabled at the end of the day by a scheduled task and can be enabled when needed by running this script.

The person running the script fills in the customer name and based on that it enables the right account and gives it a randomly generated password.

<#

## Description ##
   This script is used to enable the test account with a randomly generated password for a specific customer.
      
   By:  Stefan van Bruggen
   For: De Koning
	    
 
## Current Version: 1.0 ##

   Changelog:
   ----------------
   v1.0: First release
 
#>

# Load Prerequisites
[System.Reflection.Assembly]::LoadWithPartialName('Microsoft.VisualBasic')
Add-Type -AssemblyName System.Web

# Check for Active Directory module and import it
if (-not (Get-Module ActiveDirectory)){            
  Import-Module ActiveDirectory            
}    

# Create function for generating a random password
Function New-RandomPassword {
$Password = "!?@#$%^&*0123456789ABCDEFGHIJKLMNOPQRSTUVWXYZ_abcdefghijklmnopqrstuvwxyz".tochararray()
($Password | Get-Random -Count 10) -Join ''
}

# Set global variables
$Cust1 = "testcust1"
$Cust2 = "testcust2"
$Cust3 = "testcust3"

# Set variables
$input = [Microsoft.VisualBasic.Interaction]::InputBox('Enter customer name', 'Enable Test Account', 'Customer1/Customer2/Customer3') 
$random = New-RandomPassword
$password = ConvertTo-SecureString -String "$random" -AsPlainText –Force
$customer = $input.ToString()

# Enable the test-account and set a randomly generated password
if (!$customer) { write-host "Please enter customer name" -ForegroundColor Red}

if ($customer -eq "Customer1") {write-host "Enabling $Cust1" -ForegroundColor Yellow
                        Enable-ADAccount $Cust1
                        Set-ADAccountPassword -Identity $Cust1 -NewPassword $password}

if ($customer -eq "Customer2") {write-host "Enabling $Cust2" -ForegroundColor Yellow
                        Enable-ADAccount $Cust2
                        Set-ADAccountPassword -Identity $Cust2 -NewPassword $password}

if ($customer -eq "Customer3") {write-host "Enabling $Cust3" -ForegroundColor Yellow
                        Enable-ADAccount $Cust3
                        Set-ADAccountPassword -Identity $Cust3 -NewPassword $password}

# Show the generated password
Write-Host "Account password has been reset to:" -ForegroundColor Green
Write-Host ""
Write-Host "$random" -ForegroundColor Yellow
Write-Host ""
Write-Host ""

# Exit after input
Read-Host " Press enter to exit "
exit


[Powershell] Manipulating a machine’s asset tag in the MDT database

I wrote this function for my fellow IT engineer (and brother) Robin van Bruggen who is building a script that allows his co-workers to change the OSDComputerName and AssetTag values for a specified machine without manually manipulating the MDT SQL database.

The script uses the MDTDB module created by Michael Niehaus (which can be found HERE). This module allows you to change pretty much anything you would want to change in the MDT database except for, you’ve guessed it, the asset tag.

Anyway, to keep a long story short, add this to the MDTDB.psm1 file and you’re good to go!


function Set-MDTComputerAssetTag {

    [CmdletBinding()]
    PARAM
    (
        [Parameter(ValueFromPipelineByPropertyName=$true, Mandatory=$true)] $id,
        [Parameter(ValueFromPipelineByPropertyName=$true)] $assetTag
    )
    
    Process
    {
        # Tell SQL which table to edit and what to look for
        $sql = "UPDATE ComputerIdentity 
        SET AssetTag = '$assetTag'
        WHERE ID = '$id'"
        Write-Verbose "About to execute command: $sql"
        $identityCmd = New-Object System.Data.SqlClient.SqlCommand($sql, $mdtSQLConnection)
        $identity = $identityCmd.ExecuteScalar()
        Write-Verbose "Added computer identity record"

        
        # Write the updated record back to the pipeline
        Get-MDTComputer -ID $id
    }
} 


[Exchange 2010] Autodiscovery issues

The Problem

One of our customers was having trouble with autodiscovery not functioning on one of their Exchange 2010 CAS-servers. I was asked to take a look at it and one of the errors in the eventlog stood out in particular:

Could not load file or assembly ‘Microsoft.Exchange.Security, Version=14.0.0.0, Culture=neutral, PublicKeyToken=31bf3856ad364e35’ or one of its dependencies. The system cannot find the file specified. (C:\Program Files\Microsoft\Exchange Server\V14\ClientAccess\Autodiscover\web.config line 940) 

Now, let’s open the web.config file mentioned in the error message. You will most likely see a whole bunch of file:///%ExchangeInstallDir%, and this is exactly what the problem is. In some cases, Exchange is unable to find the installation path using this variable and luckily the fix for this is quite easy.

The Fix

Fire up your favourite text editor, and do a Find&Replace on file:///%ExchangeInstallDir%bin and replace it with file:///C:\Program Files\Microsoft\Exchange Server\V14\bin\ or whatever your installation directory is.

Before:

After:

Try opening the autodiscovery.xml again, et voila! Problem solved.

[Powershell] Removing the NXLOG-agent without the Nagios management interface.

I made this script at the request of a colleague, who needed a quick way to remove the NXLOG-agent without having to resort to the management interface (which was unavailable).

<#
.Description
   Script for the removal of the NXLOG agent without the use of the Nagios management interface.
   
   Current Version: 1.0
   Changelog:
   ----------------
   v1.0: First version, ready for use
   
   By: Stefan van Bruggen <info@svanbruggen.nl>
   For: de Koning B.V <svbruggen@koning-ict.nl

#>

##		Define the path where the key should be located and start a recursive search
##		The script only looks for a registry key containing the right display name and publisher, and selects the LocalPackage property.

$inst = Get-ChildItem -Path HKLM:\SOFTWARE\Microsoft\Windows\CurrentVersion\Installer\UserData\* -Recurse | Get-ItemProperty | 
		Where-Object {$_.DisplayName -like 'NXLOG-CE' -and $_.Publisher -like 'nxsec.com' -and $_.Publisher -ne '' } |
		Select-Object LocalPackage -ExpandProperty LocalPackage

## 	Silent install of the package, required for the next step

Start-Process $inst -arg '/q' -Wait

##	 Silent uninstall of the agent

Start-Process "msiexec.exe" -arg "/X $inst /qn" -Wait

This script could also be modified quite easily to run on a remote computer by adding the following at the beginning of the script:

$PC='SRV-NAME-01'

Invoke-Command -ComputerName $PC -ScriptBlock {

In this case, don’t forget to add a in line 21.

[SentinelOne] New blogpost @ De Koning

Hi everybody,

For the Dutch-speaking readers out there who are interested in the AV product I mentioned in my previous blogpost (SentinelOne), I have written a blogpost for the website of my employer De Koning in which I go into a little more detail about SentinelOne.

You can find it HERE

I might translate it to English later, but no promises.

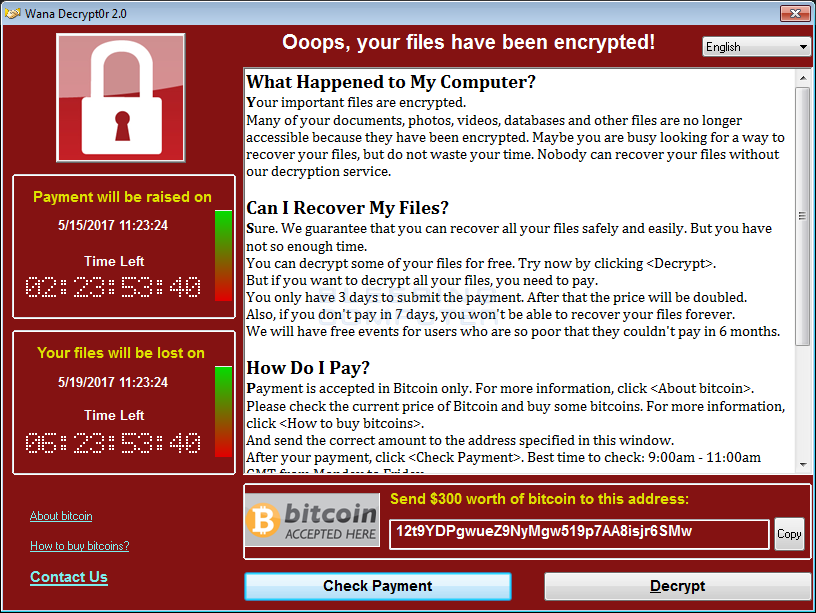
[Ransomware] WanaCrypt0r, how does it behave during an infection?

Ooops, your day may have been ruined!

Introduction

Well, I don’t think this one needs a lot of introduction because the chances that you haven’t heard about this latest ransomware problem are pretty slim.

So, assuming we all know what it is and what ransomware does, how many people have observed the process in detail?
Sounds like it’s time to take a closer look at what actually happens when a system gets infected.

(Don’t forget to click the screenshots if you want to read the details)

How the test was performed.

In this scenario, I created a Windows 10 Virtual Machine, planted a few decoy files and installed some common applications like Microsoft Office 2016, Mozilla Firefox and 7Zip.

Now, of course we aren’t going to infect this machine and just shut it down again, we want to monitor it and have a way to reclaim control over the VM. To achieve this I used the next-gen AV solution SentinelOne.

SentinelOne is different than regular AV solutions because it does not only look at the hash of the malware files, but instead looks at what it does.

I won’t go into the technical details, perhaps in a future blogpost, so to keep it short: Imagine opening a Word file and the second you do that, it starts creating new processes, modifies registry entries, etc. SentinelOne monitors this behavior and when a certain threshold of suspicious behavior is reached it kills the process and rolls back the changes made by the malware.

Results: What happens when you execute the malware?

I executed the WannaCry ransomware on the VM and configured SentinelOne to only alert instead of killing the process. SentinelOne keeps monitoring the VM and auto-creates a nifty report in the management console.
Keep in mind that at this point, the entire VM has been encrypted and these nice people are offering me the decryption key for bitcoins.

So, this entire process resulted in a .CSV report featuring a small amount of… 17288 rows! I selected a few interesting parts to highlight in this post, let’s start by taking a look at who this bad boy tries to talk to.

Friends in Germany and the USA, so no Russian/North-Korean/Chinese/Mordor influence so far.

Onwards to the ‘installation’ of the ransomware, the creators took their time to provide proper customer service and included translations for 28(!) languages to show the payment instructions in:

Next, it downloads the readme-file, the background.jpg to replace the users wallpaper with, the decryptor-tool to fill in the key with after payment, and multiple .bin.gz files.

Not visible in this screenshot but interesting nevertheless, it even downloads a TOR browser for you! How nice of them.

Of course, the process would not be complete without deleting shadow copies, stopping services and acquiring persistence on the machine:

And now it starts wreaking havoc, in a time-span of barely two minutes (you read that correct, two. minutes.) it encrypts everything it can find on the machine rendering it completely out of order until the ransom is paid.

Conclusion.

Because SentinelOne is running on the machine, getting rid of the infection was quite simple by issuing a Rollback-command from the management console.
By using this option, SentinelOne rolls back all the changes made by the ransomware and notifies the user that the system has to be rebooted.

After the reboot, the machine is back in it’s original pre-infected state and the infected files are cleaned up.

Of course, in a production environment you would configure SentinelOne to kill the process right away to prevent further damage. You also have the option to disconnect the machine’s network connection and notify the other clients about the infection’s behavior so that they can prevent getting infected themselves as an auto-immune response.

If you are interested in the report containing the raw data, contact me on Twitter (@SvanBr) or shoot me an E-mail.

Disclaimer: I am not sponsored by SentinelOne in any way.


[Microsoft] Hands-on Labs – Quick Review


I’ve waited for this moment for so long… *wipes away tear

Last week, Microsoft finally launched the ‘new and improved’ version of TechNet Labs (found here) called Hands-on Labs.

Introduction
In these labs, Microsoft provides you with an Azure-powered live environment  you can use to practice their new and current products without the risk of messing up your own systems.
Currently, they provide a pretty wide range of options including Server 2016, Azure, SQL Server and many more. (note: For some reason sorting the labs by newest places the newer products at the last page instead of the first).

Let’s get started, fire up those VMs!

So, let’s start with a randomly chosen lab to see how it all works, shall we? First we pick a lab and view the details:

Looks interesting enough, time to launch the lab and let Azure do it’s magic..


When launching the lab, we get redirected to a new webpage and you get to see a progress window, just to let you know it’s working hard to start your lab. (Wouldn’t want people to think Azure is taking it easy, would we?)


First impressions

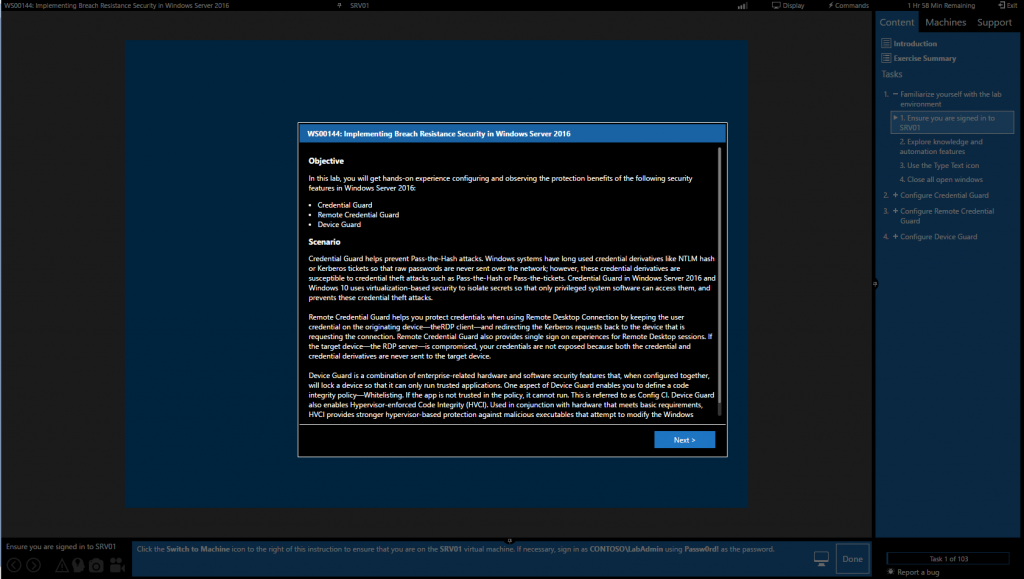
Creating and booting up the required VMs was faster than I expected, within a few minutes you are greeted by a short introduction of the lab objective and you are ready to get that knowledge flowing into your mind.

Is it any good?

Based on the short time I spent clicking through a few of the labs, I have to say that I’m very positive about the Hands-on Labs.

The process of launching the labs, creating the VMs and working with the labs is very straightforward and works pretty smooth. I expected this process to take a lot longer, but Microsoft does a good job of providing their users with a fully functioning environment in a very short time.

If they manage to provide new labs before or shortly after the release of new products or product versions, I can see this becoming a must-use tool for exam preparations and a very handy tool to get some hands-on experience with the products you are planning to implement in your own environment.
Conclusion: Very positive first experience, with a lot of potential uses.

[Rant] LinkedIn Recruiters..

Dear Steven,

Apologies for the direct approach, but after reading your LinkedIn profile I just had to show you this perfect oppertunity at one of my clients!
My client is a young/dynamic/rockstar/IT-ninja/growing/etc. organisation who’s growing fast and is looking for a young/dynamic/rockstar/IT-ninja/superstar/talented [INSERT JOB TITLE].

Now I was wondering if you value career growth, more money, a brand-new car and yourself? Because if you do, you are the one they need.

Let’s talk about this offer over a cup of coffee sometime, I’ll hear from you soon! 🙂

Cheers,

Ricky Recruiter
Recruiting Rockstar
Recruiting Inc.

Sounds familiar, doesn’t it?

It seems like it’s hunting season again for IT recruiters all over the Netherlands, because these kind of messages have become a daily occurrence.

Of course, spelling my name wrong and showing me a job offer that has nothing to do with my experience (I’ve even received an offer for a job as an Oracle Administrator…. really?) is a clear giveaway that they spam multiple people with a copy+paste message.

*Sigh* .. anyway, at least I have a good idea of my market value thanks to these people.

Stefan van Bruggen - 2019